I can’t stop thinking about DIY floating shelves ideas lately – they turned my awkward little apartment wall into a mini personality display, and I seriously felt like a grown-up for a hot minute. I started with one tiny shelf and it snowballed into a whole shelving mood board that actually makes mornings easier.
This post exists because I know how overwhelming small-space shelving can feel; I’ve tried too-deep bookcases that swallow light, and skinny ledges that sag under the weight of my favorite novels, so I got hands-on and figured out what actually works. I tested a handful of styles, learned a few hard lessons – yes, including a stripped screw – and saved the best, practical ideas just for you.
You’ll get 15 doable DIY floating shelves ideas that are perfect for small spaces, plus friendly tips to pick materials and tools so you can finally stop staring at that sad, empty wall and actually make something pretty and useful.
These 15 DIY Floating Shelves Ideas for Small Spaces You’ll Love
Hidden Bracket Shelving
This shot makes me think of the first time I tried brackets that vanish into the wood – feels almost like magic when you reach for a book and the shelf looks like it’s floating. I remember standing on a step stool, heart racing, in case my leveling was off – not glamorous, but so worth it. If you want a clean look in a tiny room, hidden brackets give that airy vibe without stealing depth.
Floor-to-Bookshelf Glow
This full-wall bookshelf look is perfect when you want the “library” feeling but have a narrow footprint; stacking shallow floating shelves saves floor space and still holds a surprising number of reading favorites. I did a version of this in my hallway and people always assume my place is bigger than it is – score. Little tip – stagger heights so taller coffee table books have breathing room.
Soft Wall Light Shelves
Adding small wall lights above or below floating shelves instantly dresses them up and makes your display feel intentional; soft lighting is my secret for cozy evenings. I once wired a tiny puck light behind a shelf and it looked like a tiny gallery – very fancy for cheap. If you’re new to wiring, you can use battery-powered LED strips and still get that halo effect without the fuss.
Simple Double Shelves
I love the simplicity here – two matching wooden planks make a huge impact with minimal effort, which is ideal when you’re rushing to finish a room makeover. Once I installed two like this above my desk, paper chaos somehow looked curated, weirdly. Keep the spacing consistent and don’t over-clutter – negative space is your friend.
Plant & Pot Display
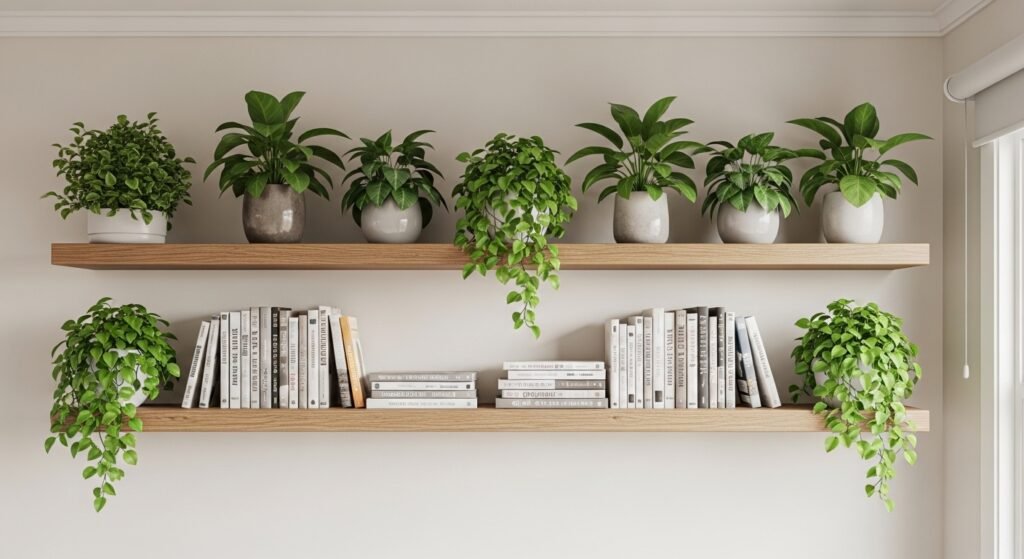
If you like greenery, mounting a trio of shelves for plants makes a vertical garden that brightens tiny apartments fast. I have a guilty pleasure of rotating succulents and trailing ivy on mine, though my cat did knock one down last spring – sigh. Use lightweight pots with saucers to avoid water stains and keep them shallow to reduce weight.
Work-In-Progress Wood Shot
This is such a satisfying “before it becomes a shelf” moment – raw wood in hand makes you feel capable even if you’ve never picked up a sander. I remember this exact phase when I helped a friend and we spent an hour choosing knots and grain patterns like we were curating a tiny museum. If you’re nervous, test a stain on the edge so you know what the finished piece will look like.
Kitchen Floating Shelves
Kitchen shelves are my favorite small-space win – they keep everyday items accessible and force you to edit what you actually use, which is surprisingly freeing. I swapped out a closed upper cabinet for two floating planks and suddenly breakfast felt way more Instagram-able, not gonna lie. For heavy dishes, keep a shelf shallow but supported by metal brackets or anchored studs.
Sanding & DIY Prep
Seeing someone sanding makes me happy – the tactile part of making shelves is oddly therapeutic, and imperfections give character. I once sanded in my pajamas at midnight because I couldn’t wait till morning, which probably wasn’t wise but felt productive. Take your time with edges so paint or stain sits evenly and you won’t be fixing drips later.
Cozy Workshop Build
This little workshop moment shows that you don’t need a fancy space to build shelves – a corner table and good music work wonders. My holiday build (yes, with a Christmas tree in the background) became a family joke, but we finished faster than expected. Keep a cup of water nearby – sanding makes dust, and you’ll need a break, trust me.
Screw-In Installation Close-Up
Close-ups like this are so practical because they remind you to pre-drill and use the right screw – little things matter. I stripped a screw the first time I tried to rush, and had to buy an extractor kit – lesson learned. If you feel resistance, back out and check alignment rather than powering through it.
Green-Filled Shelves
Shelves full of plants give a mini urban jungle vibe that makes any small room feel lively and intentional; they also hide imperfections, which is a nice bonus. I planted a tiny herb row on a kitchen shelf once and now I’m obsessed with snipping fresh basil for everything. Remember to rotate pots occasionally so every plant gets sunlight.
Slim Peg Plywood Ledge
Peg-supported plywood shelves are budget-friendly and surprisingly sturdy if you pick good pegs and anchor them well. I used a similar trick in my craft corner – the plywood was cheap but looked expensive after a coat of white paint. If you’re worried about wobble, use two pegs per side and test with weight before styling.
Plywood & Peg Detail
I adore the utilitarian charm of plywood with visible pegs – it’s honest and modern at the same time, and perfect for renters who want a removable look. I once installed pegs on a rental wall and removed them at move-out without drama – win. Sand edges smooth and seal the plywood so it doesn’t fray over time.
Everyday Wood Storage Ledge
Simple wood ledges mounted low become instant storage for shoes, baskets, or kids’ things and they keep floor clutter under control. When I had a tiny entryway, a shallow ledge saved so much space and made mornings flow better. Try mixing baskets and hooks underneath for extra organization in small areas.
Handheld Shelf Detail
This intimate shot of holding a shelf edge is oddly reassuring – it’s a reminder that building is just a series of small actions, one hand at a time. I still have a little paint smudge on my thumb from my first project and I wear it like a badge. If you plan placements, hold the board up yourself first to visualize before committing to screws.
How to Actually Make This Work For You
Start by measuring twice and picturing how you’ll actually use the shelves – if you only want to display a few favorites, choose shallow boards and keep them staggered; if you need storage, go deeper and anchor into studs or use heavy-duty anchors, not the flimsy ones from the bargain bin. Think about weight first – books and plants add up fast, so pick hardware rated for at least double what you expect to hold, and don’t be afraid to ask for help when drilling especially high or into tricky walls. Finally, finish is the mood-maker: a clear matte seal keeps wood looking fresh without glare, and a little sanding will save you from paint peeling later – it’s the small prep steps that pay off in the long run.
How much weight can floating shelves hold?
It depends on the bracket style and how they’re anchored – simple floating shelves attached to studs can hold 30-60 lbs each, while heavy-duty systems can hold much more. Always check manufacturer ratings and, when in doubt, use multiple studs or toggle anchors for heavy items.
What tools do I actually need?
You really only need a drill, level, stud finder, tape measure, and appropriate screws or anchors for basic installs – plus sandpaper or a sander if you’re finishing the wood. Optional extras like a countersink bit, clamps, and a paintbrush make the job cleaner and faster but aren’t mandatory for a successful shelf.
Can renters install floating shelves?
Yes, renters can use smaller shelves with proper anchors or removable rail systems that distribute weight and minimize wall damage – clear it with your landlord first. If you want a totally non-permanent option, use adhesive picture ledges designed for rent-friendly setups, though they’re best for lightweight items.
How do I choose the right depth and spacing?
For small spaces, 8-10 inches depth is usually perfect for books and decor without protruding too far, while 12 inches is better for plates or larger objects; space shelves vertically to match what you’ll put on them, leaving taller gaps for vases or stacked books. Mock it up with cardboard cutouts on the wall first – seeing scale in real life saves regrets later.